It’s the moment that Soccermanagerites all across the globe have been highly anticipating! We said that we were gonna level up SMW and here you have a sampler of what’s in store! 😃 👏
I’m quite certained that these new tactical instructions left some licking their lips and rubbing their hands like Birdman, while also leaving most overwhelmed wondering what the 🤬 are all these new shenanigans that have entered their SM Managerial brain… Rest assured mate, I’ve got you covered! 💯
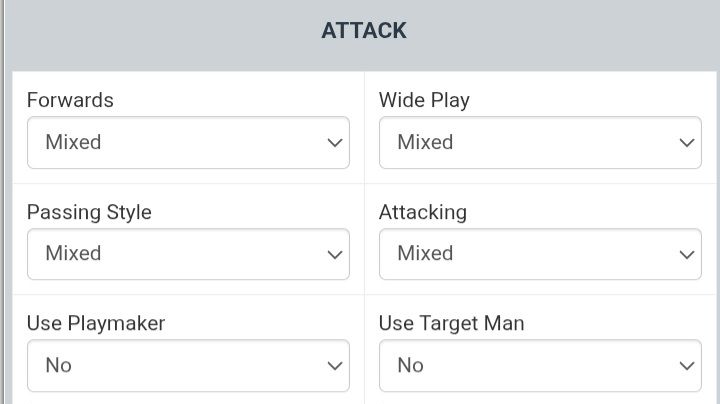
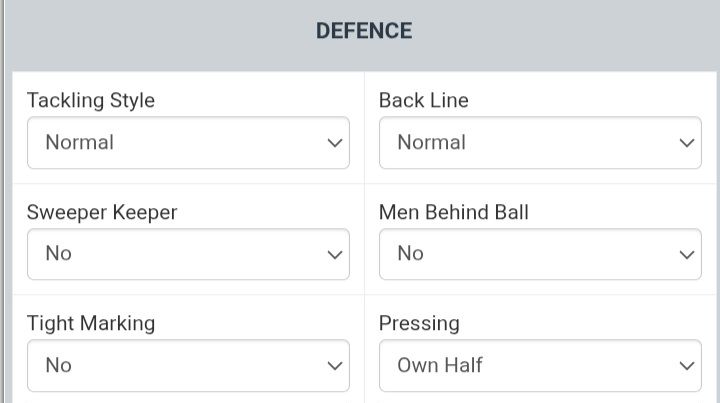
Alright, so here is the following improvements to the tactics area within Soccermanager Worlds if you’ve been living under a rock:

I’ll aim to explain all of the more advanced options via the use of varying images in addition to also skimming through the stuff we should already know (might reconsider the latter since you’re simply never smart enough to re-learn the basics). I’ll try to keep the explanations as swift and straight forward as possible! 🤞
For the illustrations, I’ll need to use a random ass starting XI… So, here’s our lucky volunteer:
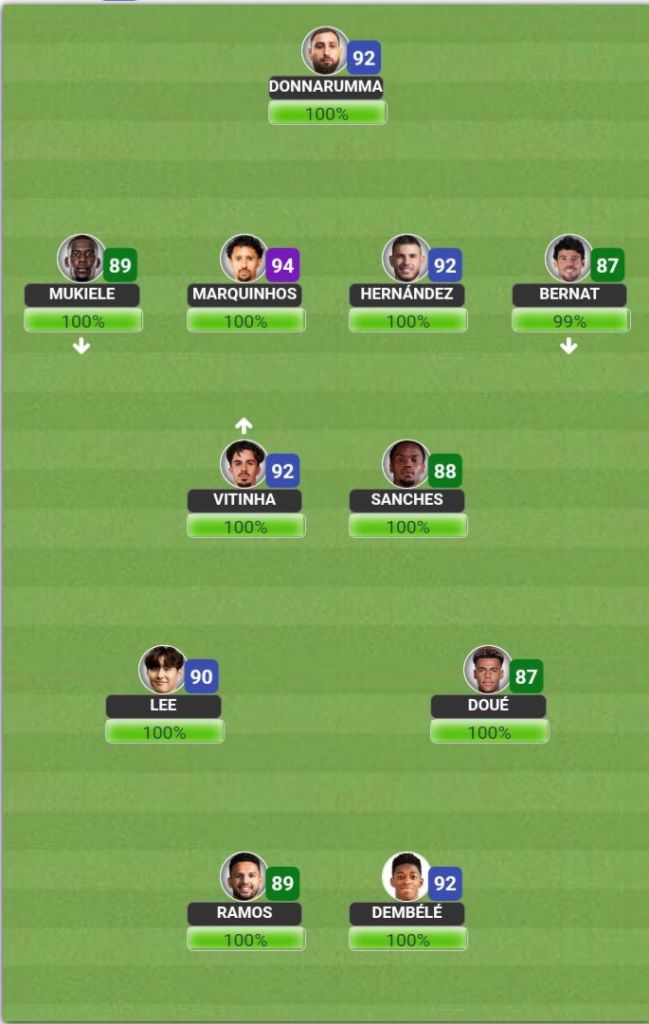
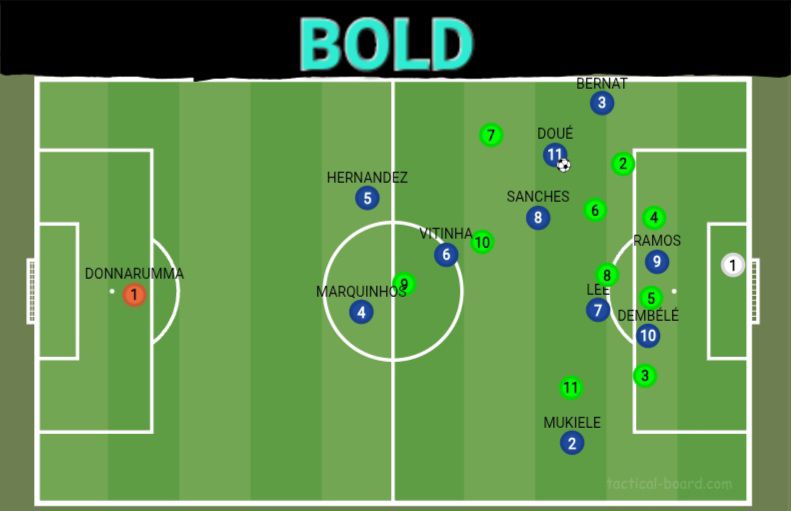
And for even more clarity, here’s their respective roles within this 4-2-2-2:

GENERAL: Width
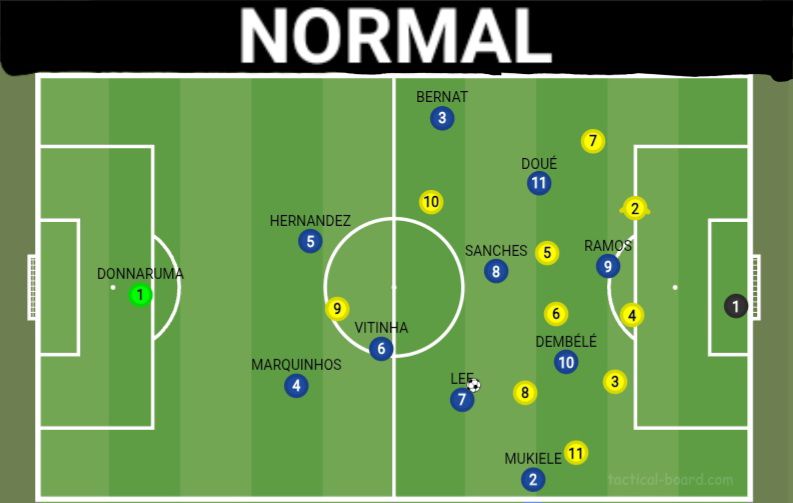
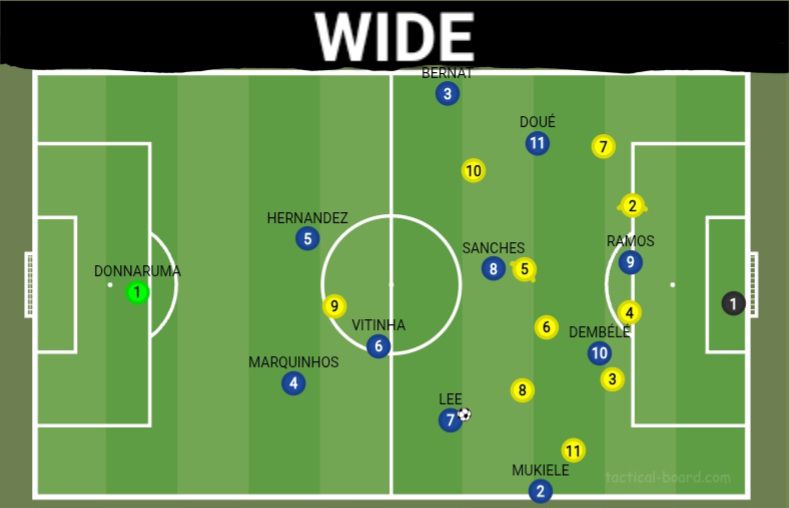
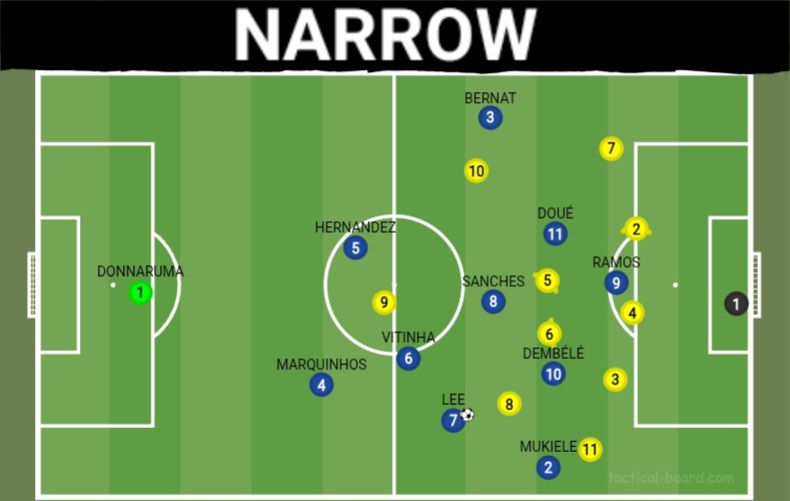
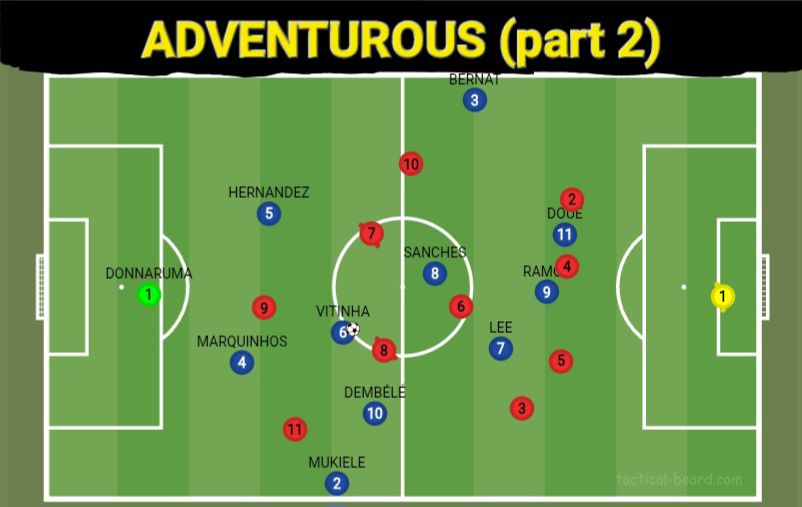
As you can see, it’s pretty much the same base positioning with the sublety of every player now being closer to each other (and with that, it means slight tweaks to some of their movement, like Ousmane Dembélé, Vitinha, Renato Sanches, and Doué’s positions compared to the previous two illustrations )
NOTE: The width in which you decide to use will impact both in and out of ball possession. So, if I chose to play a Narrow width it means that we’d stay within this narrow shape even when we don’t have the ball. You can counter this by utilizing varying formations like playing a Narrow width with a 4-2-3-1B which allows for natural wide play due to the base positions of the No.7 and No.11 always being on the touch line, but that’s a topic for a future blog.
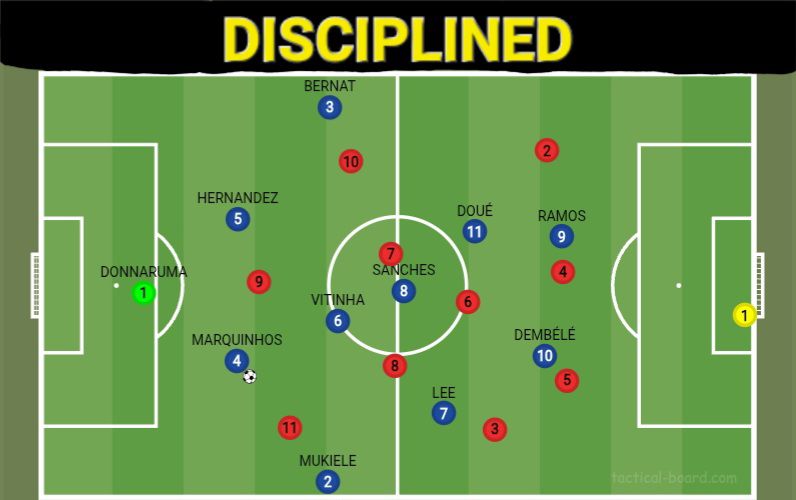
GENERAL: Formation Fluidity
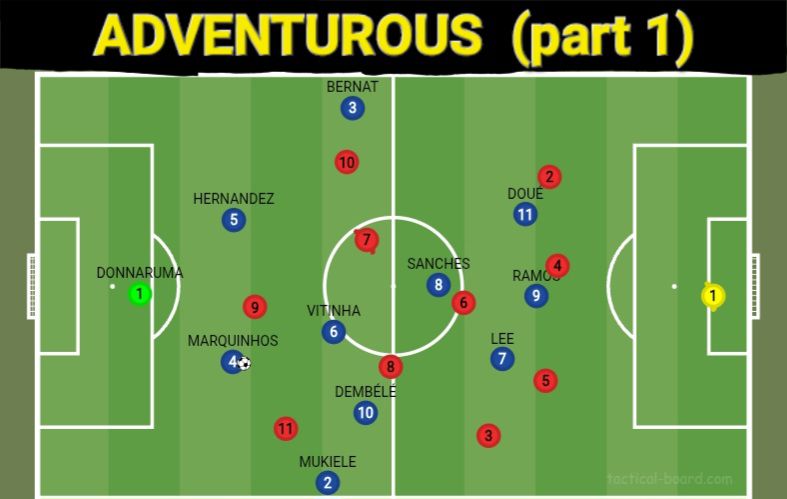
Rather than keeping the same formula from above, we are aiming to utilize as many real life scenarios within today’s blog since not every opposition you come up against will aim to sit back and allow you to dominate. So, for this section, we’ll be explaining the various formational fluidity options against a team playing in a 4-3-3B who are pressing all over, aiming to tight mark P.S.G out of the game, with a high backline.
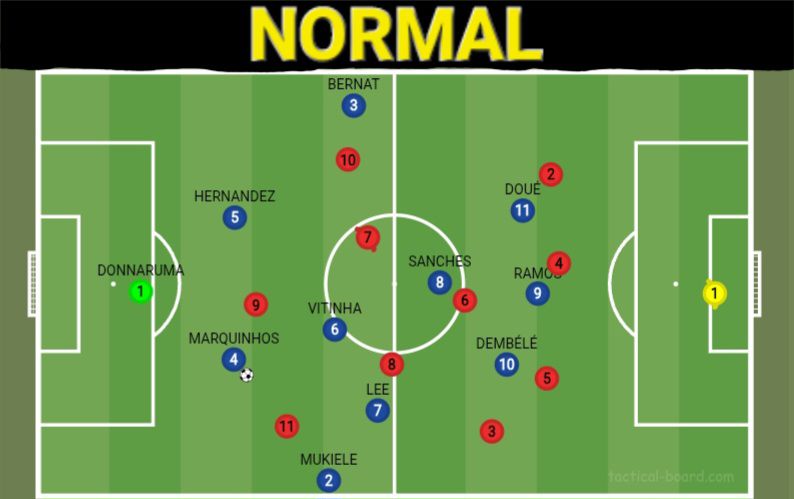
For this XI, the normal fluidity allows for a bit more expression which we can clearly see with Lee dropping in to cause an overload on the right hand side, Sanches moving up the pitch to drag some oppostion players with him (remember his ‘B2B’ role), Gonçalo Ramos drifting a bit more towards the ball to potentially be a ‘Target Man’ option over the high press, with Doué picking up a position nearer to the D(R)
Adventurous
I’m certained that as soon as many of you saw this you immediately rushed to choose it, lol! Although it is the most attractive of the three options, we still have to take into consideration our overall style of play and the players at our disposal. It just so happens that this XI benefits from this fluidity most. 😎
GENERAL: Creativity
“To play or not to play. That is the question at hand!”
Let’s see if I have an answer…
Again, not a bad approach, just ineffective based on this context!
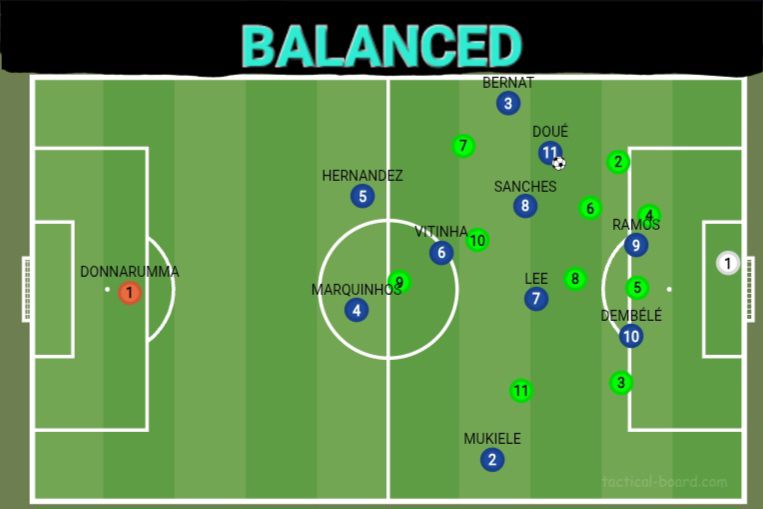
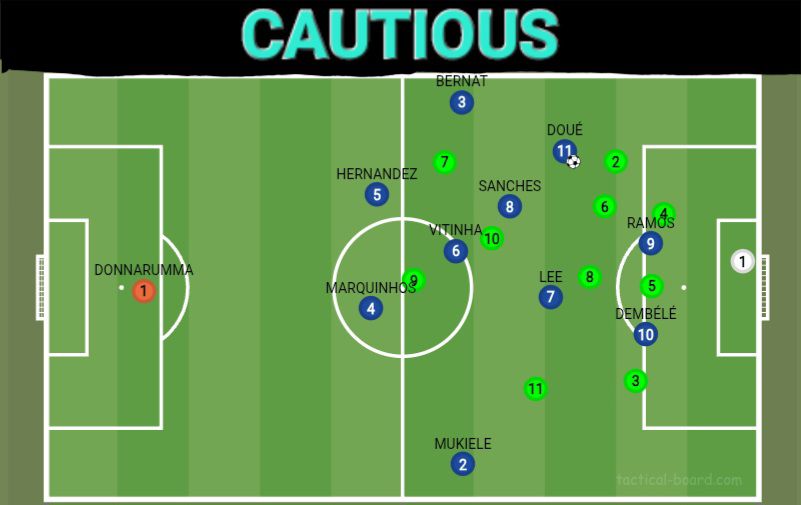
This creativity is the highest form of risk taking there is! It’s essentially saying, “I back my players so much that I’m willing to allow them to go above and beyond despite the potential of us losing the ball and being susceptible to the opposition’s counter”. And it’s not just Bernat whose overlap is the main difference between the three illustrations. Just take a look at Ramos, Dembélé, Lee, and Mukiele compared to the other two for a complete grasp of the subtle differences between each creative option
Here ends part 1… 🫣
I know, I know… Trust me bro, I know. But I have a responsibility to make sure that these blogs are capable of being read and re-read hundreds of times (which is something that won’t happen if I start making blogs that are 15 to 20 minutes long).
The one thing I want you to examine here more than anything else is how precise each variation is from the other. So, go over this as many times as you’d like to surely see the key differences and completely immerse yourself into some good’ol visualization with your favorite SMW club!
I’ll speak to you in Part 2, Soccermanagerite! 🤙

One thought on “Next level Sh*t: SMW’s New Tactics”