At the end of yesterday’s episode we promised to showcase a formation that is on opposite ends of the spectrum in terms of being the ultimate example of innovation, or being the epitome of insanity. By the looks of the above image, I can confidently say that today’s episode has no chance of disappointing….
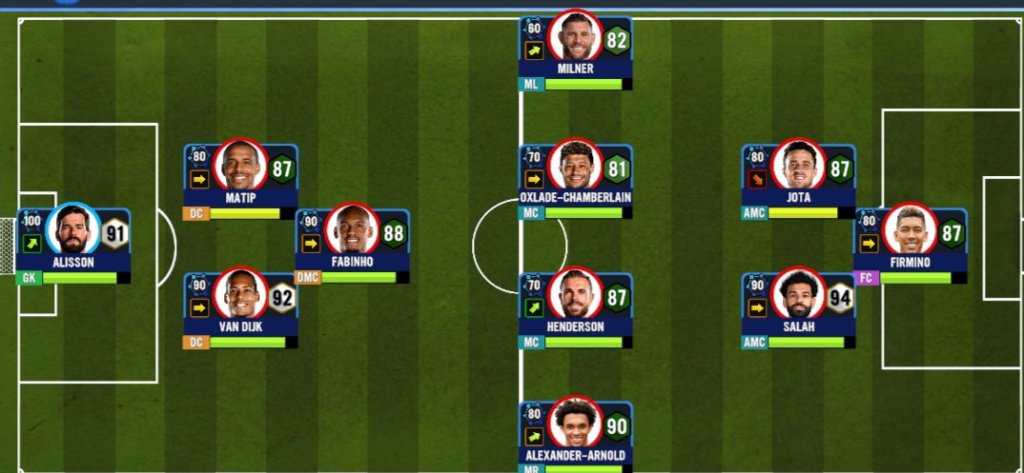
As crazy as it may sound, today’s formation is actually a conversion of a quite popular formation that might even be the most popular in modern football at the moment. Think you’d be able to identify which one I’m talking about?? If you look real closely at the image you’ll be able to figure it out:

Figured it out yet? If you chose the 4-3-3, then kudos to you! You’ve won a year’s worth of Soccermanager blogs for free! 🤗
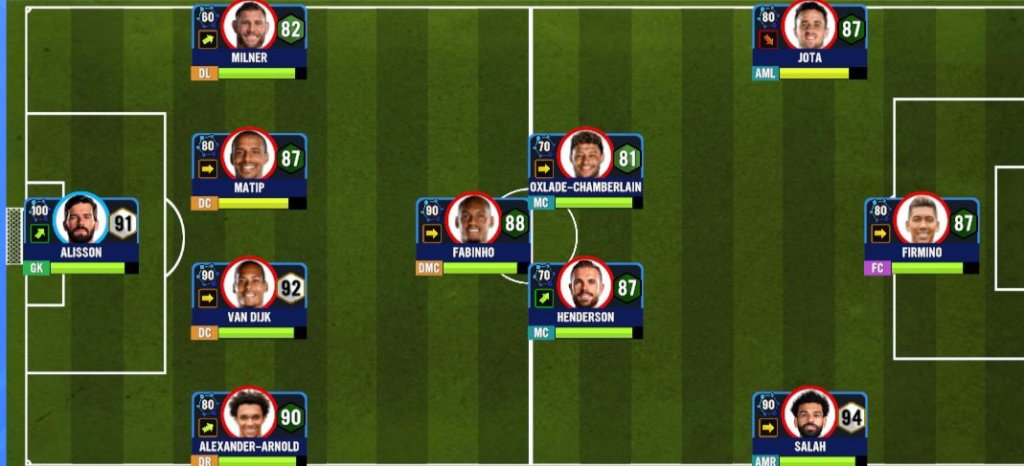
The 2-1-4-2-1 is a bi-product of the 4-3-3 When your team has possession of the ball and you want to play an extremely attacking set up. This formation requires perfection from defence to attack and you must have the exact personnel that suits it best within every position in order for you to use it successfully. Obviously, there is the downside of it having limited numbers in the defence but that can be navigated if the players you have at your disposal are the perfect match.
The player roles for each position is so important that we’ll have to go into a bit of explanation so that you can fully grasp how to use this formation:
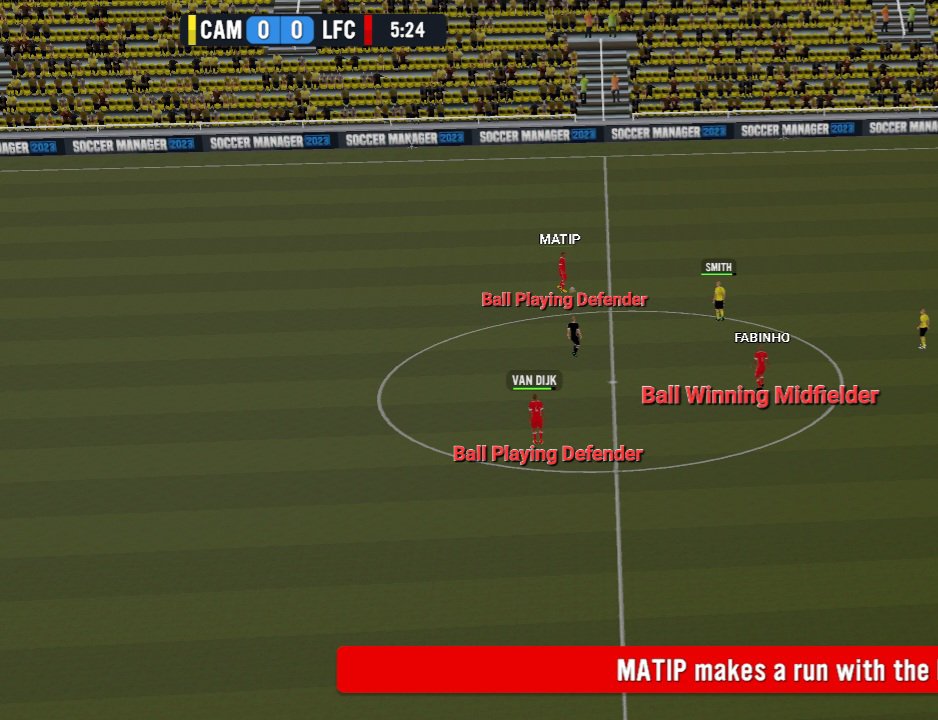
GOAL KEEPER AND DEFENCE
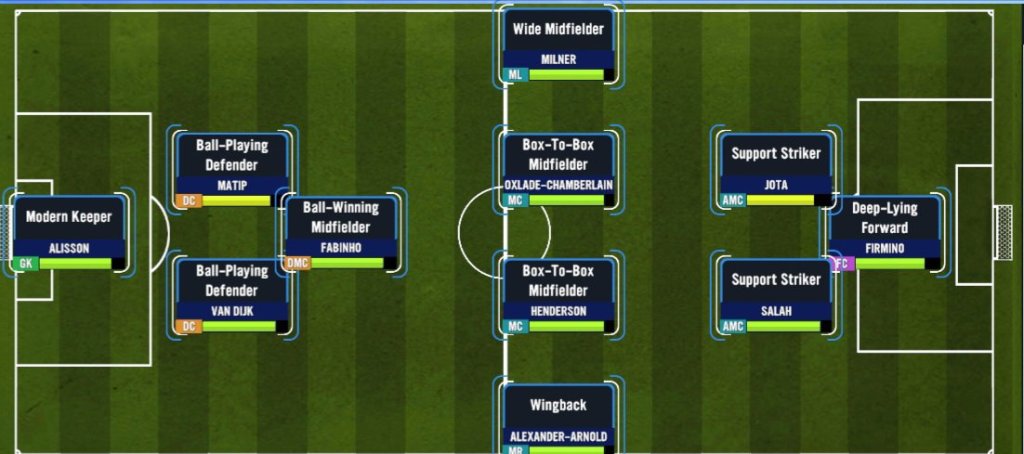
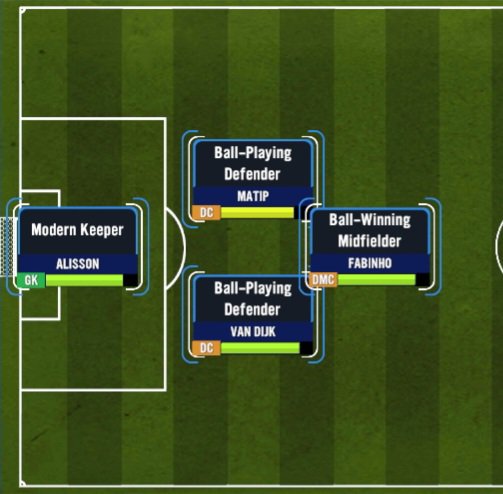
Since there is a limited number of players here, the roles that each play must be used by those who are capable enough on the ball. Therefore you will require a Modern Keeper and two Ball-playing Defenders who can handle the ball even in pressure situations. The DM(C) within this formation is primarily responsible for defensive activities so he must play as a Ball Winning Midfielder who will look to stop opposition attacks while keeping things very simple on the ball (and when I say simple I mean REALLY simple).
MIDFIELD
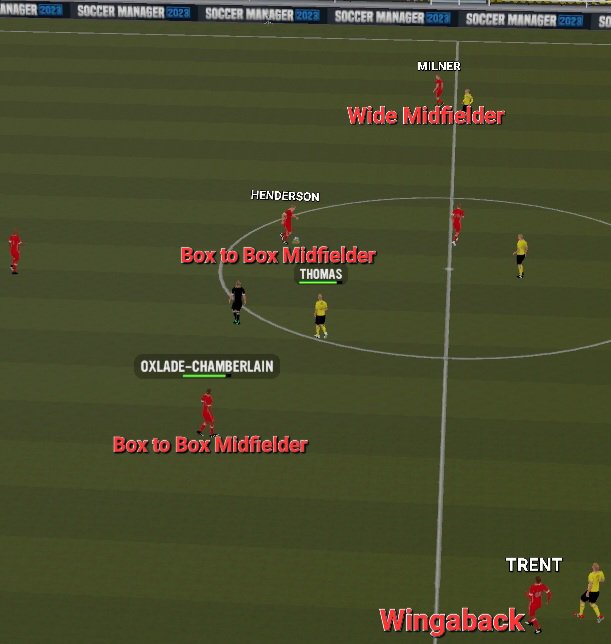
The midfield area is pretty straight forward as it is the one position that requires a specific type of player in order to work effectively. Starting off with the wide players, it must be taken into consideration that they are essentially DM(R)’s and DM(L)’s who are playing higher than usual, so the players who are in these positions MUST have a decent level of defensive capabilities in order to play here (which can be things such as positioning, workrate and aggression for those players who aren’t actually Fullbacks). In my case, I have chosen to play with Trent as my Wingback and Milner as my Wide Midfielder, but Milner is only playing here due to his ability to play as a Wide Midfielder. It is important to note that only wide players who can play in the M(R,L) positions (as well as having high levels of the attributes mentioned above) can be considered to play within this formation. The reason for this is to ensure that the X1 is. It too attack heavy since it is mandatory that that one of the Wide players within the 2-1-4-2-1 has to be a Wingback with the other being “decent” in defence.
Lastly, we take a look at the most important players within this formation, the 2 M(C)’s. They are at the heart of everything we do on and off the ball and must be the fittest players on the pitch, so they can only operate as Box to Box Midfielders with an exception for Playmakers who have high levels of Workrate and Stamina like a Naby Keita, Alexis Mac Allister, or Nicollo Barella for example.

FORWARDS
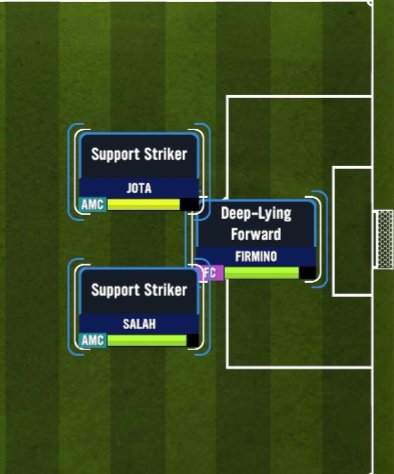
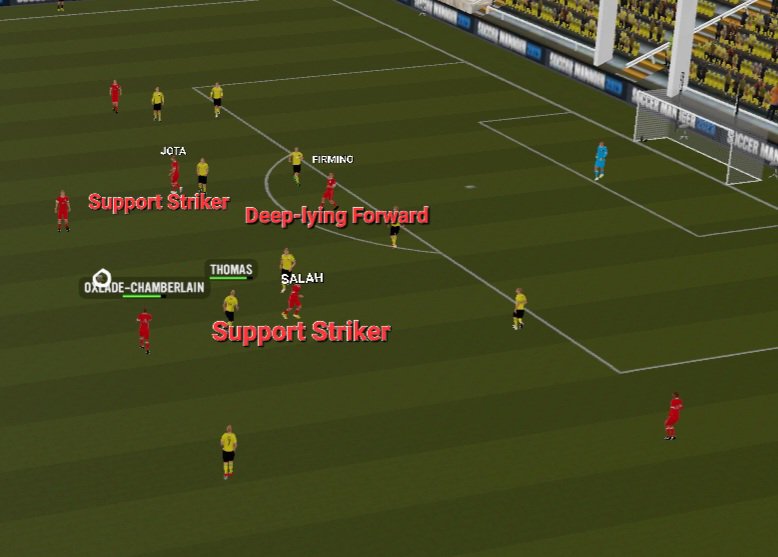
The forward area within this formation gives us a bit of freedom in terms of the players that we can choose, but it still requires a good balance between the 3 to get the best out of them. Since the Forwards playing out wide are inverted centrally within this formation, the only way for us to know which role to play them in will be based on their original proffered role. If they are Wingers ( in the case of a Luis Diaz) then they will be played as a Floating Advanced Playmaker. If they are Wide Forwards ( in the case of Salah or Jota) then we will play them as Support Strikers. Now, balance is absolutely crucial in order for them to play at their best, so the players in behind your F(C) will determine the type of No.9 you should play with .
If you have two Wide Forwards converted into Support Strikers, then you’re No.9 has to be either a Deep-lying Forward or Technical Target man:
On the other hand, if you have two Wingers converted into Floating Advanced Playmakers, then your no.9 should be either an Explosive Target Man or a Finisher:
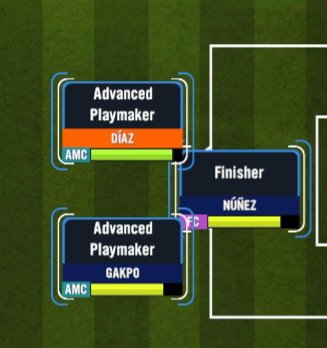
*Image of 2 Floating Advanced Playmakers and Finisher in SM23 with caption*
Alrighty, I hope everything above makes sense and is easy to follow 👌
This formation requires discipline within its use but once you’ve start seeing results you wil become hooked. In tomorrow’s episode, we’ll be bringing things back down to earth by taking a look at an interesting variation to the ‘4-1-3-2’. In a bit ✌️

